DIY Blind Installation: A Step-by-Step Guide for Beginners

I remember the first time I decided to tackle a DIY project – installing blinds seemed straightforward enough, but I quickly realised there’s more to it than meets the eye. From getting the measurements just right to figuring out the brackets, it can feel a bit daunting.
If you’re like me and want the satisfaction of a job well done, this guide will walk you through the process step-by-step, making blind installation simple, even if you’re a complete beginner. Let’s get started!
Tools and Materials Needed
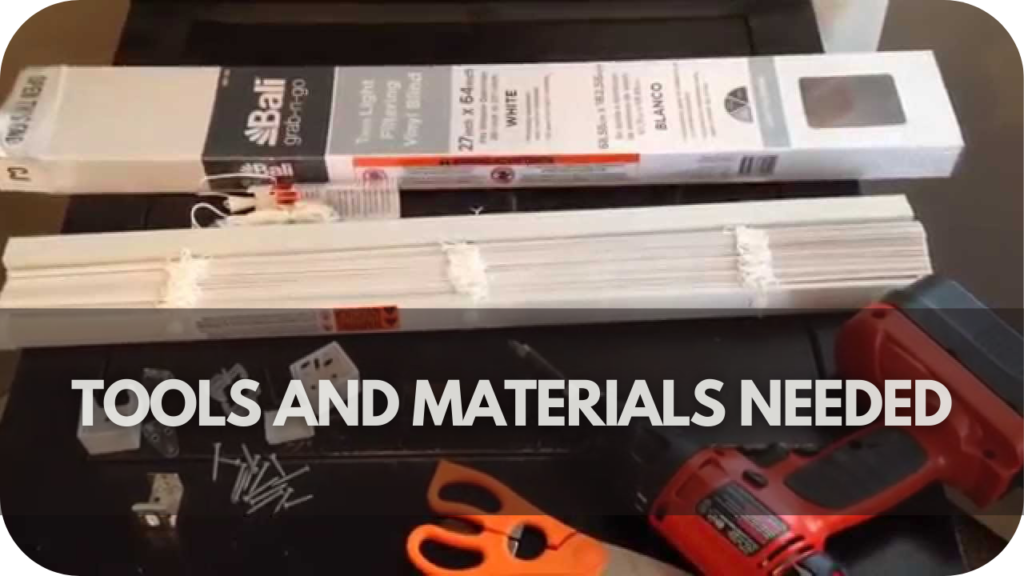
For a successful DIY blind installation, having the right tools and materials is crucial. Here’s a breakdown of what you’ll need:
Essential Tools
Having these tools and materials ready will make your blind installation process smoother and more efficient.
- Tape Measure: To ensure accurate measurements of the window’s width and height for a proper fit.
- Pencil: Used to mark the mounting points for the brackets, ensuring accuracy.
- Drill: Necessary for drilling holes in the wall or window frame for the brackets.
- Screwdriver: To secure the screws into the brackets (manual or electric).
- Spirit Level: Ensures the brackets are aligned evenly for straight and functional blinds.
- Step Ladder: Helps you safely reach high windows during the installation.
- Scissors/Utility Knife: This is for trimming or adjusting blind materials to fit custom sizes.
Materials
Before starting your DIY blind installation, ensure you have these 16 essential tools and materials for a smooth and successful process.
- Blinds: Ensure you have the right size and style for your windows (e.g., roller, Venetian, or blackout).
- Mounting Brackets: These come with the blinds and are essential for secure installation.
- Screws and Wall Plugs: To ensure the brackets are firmly fixed to the wall, especially if you’re drilling into drywall.
- End Caps: To cover the ends of the blinds for a neat finish.
- Safety Gear: Use safety glasses and gloves to protect yourself during drilling and handling.
Pre-Installation Preparation
Proper preparation is critical to a smooth DIY blind installation. Here’s how to get ready. Start by clearing the area around the window. Remove any furniture, curtains, or obstructions to give yourself enough room to move freely during the installation.
Before you begin, carefully read the installation instructions for your blinds. Each blind type may have different steps, so understanding them beforehand prevents mistakes.
Make sure all tools (tape measure, drill, screwdriver, spirit level) and materials (blinds, brackets, screws) are within reach. This helps avoid interruptions once you start.
Double-check your window measurements to ensure the blinds will fit properly. For inside mounts, measure the width and height of the window at three points (top, middle, and bottom.
Step-by-Step Guide to Installation

For a successful DIY blind installation, following each step with care is essential. Here’s a more detailed breakdown of the process:
Step 1: Mark Bracket Positions
Start by holding the brackets up to your window or wall where you intend to install the blinds. Use a tape measure to ensure the brackets are equidistant from the window edges, providing a balanced and centred fit.
Mark the spots for the screws with a pencil. If you’re installing inside the window frame, ensure the blinds won’t interfere with the window’s operation. Use a spirit level to confirm the marks are straight; even a slight tilt can affect the blind’s function.
Step 2: Drill Holes for the Brackets
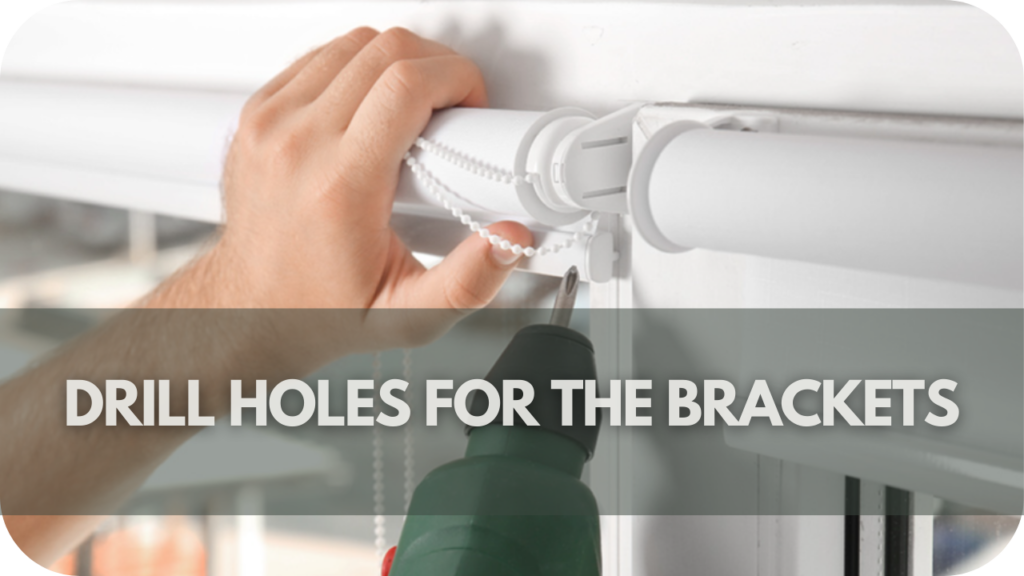
Once your positions are marked, select the appropriate drill bit for your wall type (e.g., a masonry bit for brick or concrete walls or a standard bit for drywall). Carefully drill holes where you marked the positions.
If you’re drilling into drywall, use wall plugs for extra support, as this will prevent the screws from loosening over time. Make sure to drill deep enough to hold the screws securely but not too deep to damage the wall.
Step 3: Install the Brackets
With the holes drilled, align the brackets with the drilled holes and screw them into place. Be sure the screws are tight to avoid any wobbling or shifting when you hang the blinds. Depending on the width and weight of your blinds, more oversized windows may require additional brackets in the centre to support the weight and prevent sagging.
Step 4: Attach the Blinds

Now that the brackets are installed, it’s time to attach the blinds. Slide or snap the headrail (the top part of the blinds) into the brackets. For certain blinds, there may be a locking mechanism or small screws to tighten and secure the blinds into place. Check that the headrail is securely locked into the brackets before moving to the next step.
Step 5: Test the Blinds
Once the blinds are attached, test them by pulling them down and retracting them to ensure smooth operation. If they don’t move evenly, use the spirit level to check if the brackets are aligned correctly. If the blinds seem stiff or difficult to move, inspect the installation to ensure nothing is obstructing the mechanism, such as a misaligned bracket or screw.
Common Mistakes to Avoid
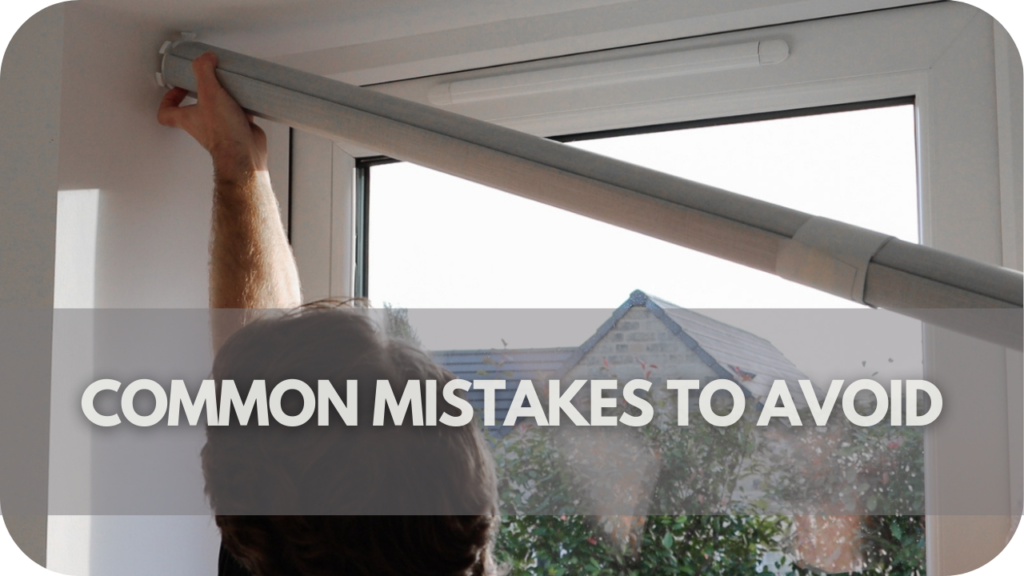
When installing blinds, beginners can often make a few common mistakes that affect the look and functionality of the final installation. Here’s how to avoid them:
- Incorrect Measurements: Always measure your window’s width and height at three points (top, middle, and bottom) and use the smallest measurement. If installing outside-mount blinds, add extra width to ensure complete coverage.
- Skipping the Spirit Level: Neglecting to use a spirit level can result in crooked blinds, which are unattractive and may function poorly. Always double-check your marks with a level before drilling. Even slight misalignments can make a noticeable difference.
- Over-Tightening Screws: Over-tightening screws when installing the brackets can strip the threads in the wall or frame, weakening the support. This could cause the blinds to come loose over time. Tighten screws firmly but not excessively.
- Using the Wrong Tools: Using incorrect tools, such as a drill bit unsuited for your wall type, can make installation difficult or even damage the wall. Ensure you have the right tools, including wall plugs for softer surfaces like drywall.
- Not Accounting for Window Obstructions: To ensure your blinds operate, you must account for obstructions like window handles or trims. Measure and position your blinds to avoid these obstacles.
Maintenance and Care

Maintaining your blinds ensures they remain functional and aesthetically pleasing for years. Here are eight essential tips for maintenance and care:
- Regular Cleaning: Dust and debris can accumulate on blinds over time, affecting their appearance and operation. To remove dust regularly, use a feather duster, microfiber cloth, or vacuum with a brush attachment.
- Spot Cleaning: For stubborn stains or dirt buildup, spot-clean the affected areas with a mild detergent solution and a soft cloth. Avoid harsh chemicals or abrasive cleaners, which can damage the blinds’ material.
- Avoid Excessive Moisture: Moisture can warp or damage certain blinds, especially wooden ones. Avoid spraying water directly onto the blinds and promptly wipe up any spills or splashes.
- Inspect for Damage: Periodically inspect your blinds for any signs of damage, such as broken slats, loose cords, or malfunctioning mechanisms. Addressing these issues promptly can prevent further damage and ensure the blinds continue to function properly.
- Tighten Loose Components: If you notice any loose screws or brackets, tighten them to prevent the blinds from becoming unstable or falling.
- Adjust Slats Regularly: Regularly adjust the slats to prevent them from becoming stuck or misaligned. This helps maintain smooth operation and ensures optimal light control and privacy.
- Check Cords and Chains: Inspect cords and chains for any signs of wear or fraying. Replace damaged cables or chains to prevent accidents and ensure safety, especially in homes with children or pets.
- Professional Maintenance: Consider hiring a professional blinds cleaner or repair service for deep cleaning or repairs beyond your expertise. Professional maintenance can prolong the lifespan of your blinds and keep them looking like new.
Conclusion
Mastering DIY blind installation empowers you to transform your living spaces with ease. You can confidently embark on your home improvement journey with a comprehensive understanding of the process.
Start by choosing the perfect blinds and following each step meticulously for professional results. Visit Into Blinds for a wide range of blinds. Your dream window treatments await!