5 Common Mistakes to Avoid During Blind Installation (and How to Fix Them)

Struggling with blinds that don’t fit or function correctly?
It’s frustrating when a simple installation turns into a headache, leaving you with uneven blinds or gaps that let in light.
Don’t worry! In this guide, we’ll reveal the five most common blind installation mistakes and provide easy, effective solutions to ensure a perfect fit every time. Say goodbye to installation woes and enjoy flawless blinds with our expert tips!
Mistake 1: Incorrect Measurement

Incorrect measurements can turn your blind installation into a disaster. Ill-fitting blinds not only look unsightly but can also fail to function properly, leaving gaps that let in unwanted light or compromising privacy. This common mistake often stems from not understanding how to take precise measurements.
1. Common Measurement Mistakes and Their Reasons:
- Measuring only the frame: Overlooking the recess depth can cause blinds to not fit properly within the window frame.
- Ignoring obstructions: Failing to account for window handles, locks, or other obstructions can lead to blinds that don’t close completely.
- Using a fabric tape measure: Fabric tape measures can stretch, leading to inaccurate measurements.
- Not measuring at multiple points: Windows are rarely perfectly square. Measuring only once can result in blinds that don’t fit well.
- Rounding up measurements: Rounding up can cause blinds to be too wide or too long, making installation difficult.
- Assuming standard sizes: Assuming all windows are standard sizes can lead to ordering the wrong size blinds.
- Incorrect orientation: Measuring width as height and vice versa can lead to ordering blinds that don’t fit.
2. Tips for Proper Measurement:
- Use a steel tape measure for the most accurate results.
- Measure the width at the top, middle, and bottom of the window. Note the narrowest measurement.
- Measure the height at the left, centre, and right sides. Use the shortest height.
- Account for any obstructions, such as handles or locks, that could affect the fit.
3. Solutions for Fixing Incorrect Measurements:
- Trimable blinds: Some blinds can be trimmed to fit. Follow the manufacturer’s guidelines to cut them down carefully.
- Spacer blocks or mounting brackets: Use these to adjust the position of the blinds if they are slightly too narrow.
- Professional assistance: If the fit is significantly off, consider getting a professional to re-measure and install the blinds.
Mistake 2: Choosing the Wrong Type of Blind
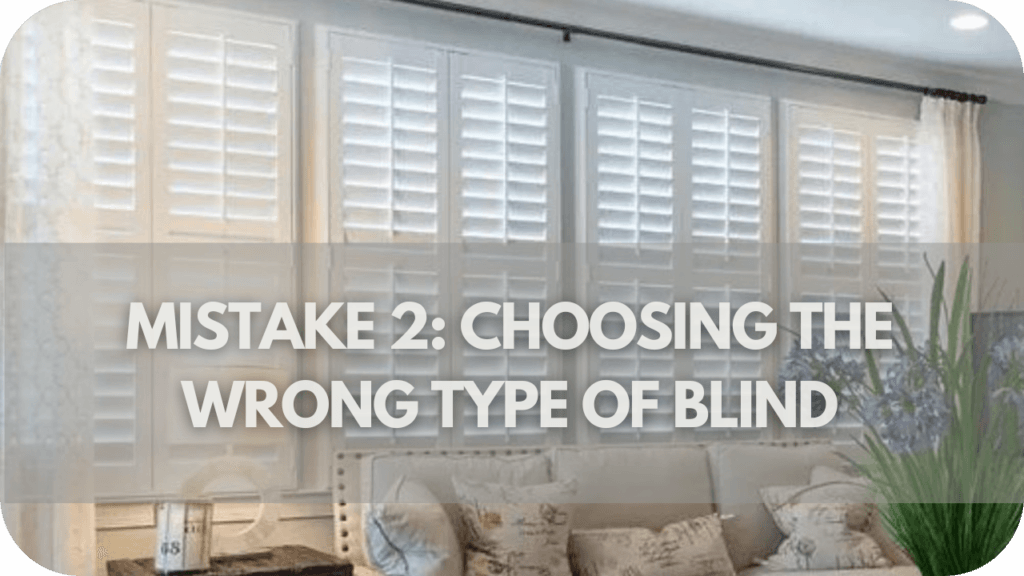
Selecting the wrong type of blind can lead to a host of issues, from ill-fitting installations to functional mismatches. It’s essential to choose blinds that suit the specific needs of each room and window. Here are seven common mistakes to avoid:
- Ignoring window dimensions and shapes: Not considering the window’s size and shape can result in blinds that don’t fit properly.
- Overlooking room purpose: Different rooms have distinct requirements; for example, bathrooms need moisture-resistant blinds.
- Disregarding light control needs: Choosing blinds that are too sheer or too opaque can lead to poor light management.
- Neglecting privacy requirements: Some blinds, like sheer ones, may not offer adequate privacy for certain rooms.
- Mismatching style: Blinds should complement the room’s decor. Clashing styles can disrupt the room’s aesthetic.
- Forgetting ease of use: Complicated blinds can be frustrating, especially in frequently used areas.
- Ignoring energy efficiency: Some blinds provide better insulation, affecting energy consumption and costs.
1. Importance of Selecting the Right Type of Blind
Selecting the appropriate blind type is crucial for both functionality and appearance.
- For instance, roller blinds are versatile and easy to use, making them suitable for most rooms, while Venetian blinds offer adjustable light control but may not be ideal for humid environments like bathrooms.
2. Common Errors and Their Consequences
- Choosing the wrong blinds can lead to inadequate light control, compromised privacy, and aesthetic discord.
- For example, installing wooden blinds in a high-moisture area like a bathroom can cause them to warp, while sheer blinds in a bedroom may fail to block out enough light for restful sleep.
3. Guidance on Choosing the Appropriate Blind Type
- Evaluate the room’s function: Select moisture-resistant blinds for bathrooms, blackout blinds for bedrooms, and stylish, functional options for living areas.
- Consider light and privacy needs: Choose blinds that balance light control and privacy specific to the room’s requirements.
- Match the room’s decor: Ensure the blinds complement the existing interior design for a cohesive look.
- Think about maintenance:Opt for blinds that are easy to clean and maintain, especially in high-use areas.
- Assess energy efficiency: Select blinds that provide good insulation to help reduce energy costs.
Mistake 3: Poor Mounting Technique
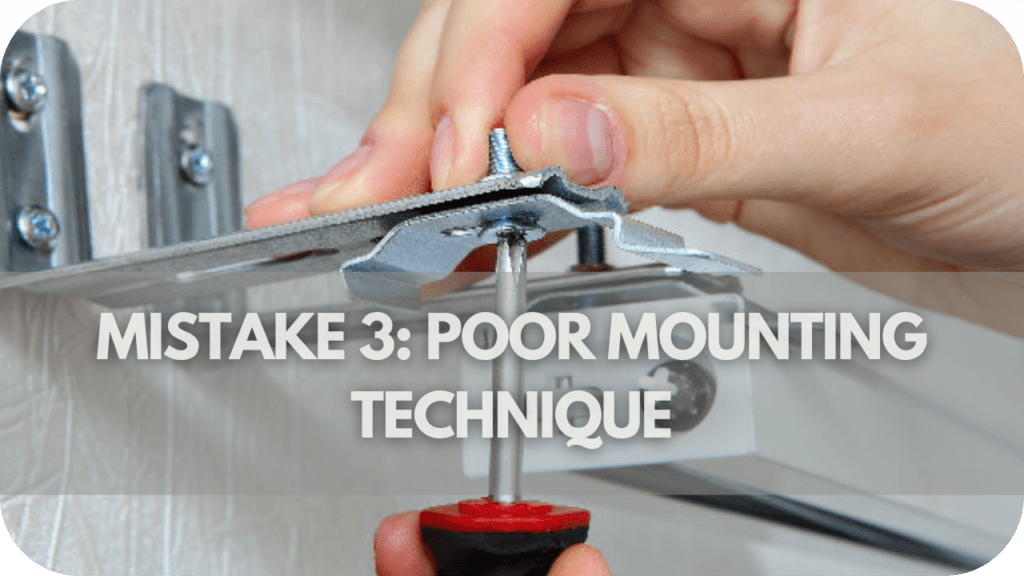
Poor mounting technique can lead to a range of problems, from unstable blinds to damage to the window frame.
Improperly mounted blinds may sag, fall, or fail to operate smoothly, undermining both functionality and aesthetics. Here’s how to avoid these issues and ensure a secure installation.
First, gather all necessary tools: a drill, screws, brackets, a level, and a measuring tape. Begin by measuring and marking the exact locations for the brackets, ensuring they are level and evenly spaced.
Drill pilot holes at the marked spots to prevent the wood from splitting. Attach the brackets firmly to the wall or window frame using appropriate screws for the material.
Next, insert the blinds into the brackets, making sure they click securely into place. Double-check that the blinds are level and test their operation.
If the blinds are unstable, recheck the bracket positions and ensure all screws are tightly fastened. If the window frame is damaged during installation, use wood filler to repair holes and consider using longer screws to reach more stable areas of the frame.
Avoid over-tightening screws, which can strip the holes, and ensure you use the correct type of screws and anchors for your wall type, whether drywall, plaster, or masonry.
Mistake 4: Neglecting to Check for Obstructions
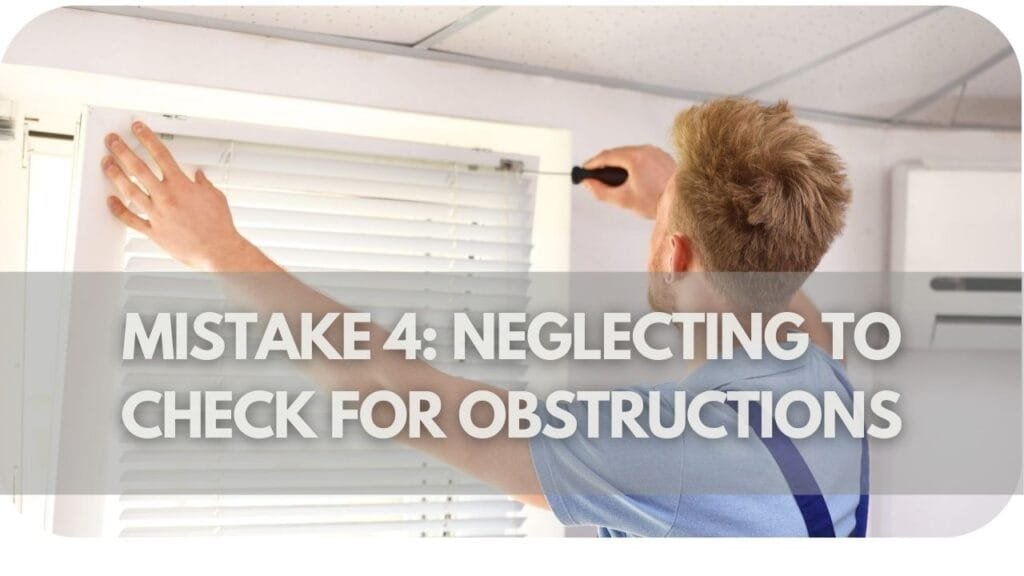
Picture this: You’ve carefully measured, chosen the perfect blinds, and are ready to install. But wait! Have you checked for any potential roadblocks in the way of your window treatment bliss?
Obstructions like window handles, locks, alarms, or even protruding window sills might seem minor, but they can wreak havoc on your blind installation. Common issues include:
- Blinds that won’t fully close: A window handle might be preventing your blinds from sitting flush against the frame, leaving annoying gaps that let in light and compromise privacy.
- Damaged blinds: Forcing blinds to fit around obstructions can cause bending, warping, or even breakage, ruining your investment.
- Uneven hanging: An obstruction on one side can throw off the balance of your blinds, making them hang unevenly and look unprofessional.
To avoid these frustrating problems, follow these steps before you begin installation:
- Thorough Inspection: Carefully examine the window area for any objects that might interfere with the blinds’ movement or placement. This includes handles, locks, alarms, electrical outlets, and any other fixtures.
- Clear the Path: Remove any removable obstructions temporarily. For fixed obstructions, consider alternative blind styles or mounting options that accommodate the obstacle.
- Plan Ahead: If you can’t remove or work around an obstruction, choose blinds that can be mounted outside the window frame or opt for shorter blinds that won’t interfere with the obstacle.
Mistake 5: Rushing Through the Installation Process

We understand the eagerness to see your new blinds gracing your windows, but remember, Rome wasn’t built in a day! Rushing through the installation process can turn your excitement into a DIY disaster.
- The Cost of Haste: A hurried approach often leads to crooked blinds, misaligned brackets, or worse, damaged window treatments. Imagine the frustration of realising your blinds won’t open smoothly or hang at an awkward angle due to a rushed job. Not only is this aesthetically unappealing, but it can also affect the functionality and lifespan of your blinds.
- Patience Pays Off: Installing blinds is not a race against time. Take a deep breath, set aside ample time, and thoroughly read the manufacturer’s instructions. These instructions are your roadmap to a successful installation.
For a Smooth Installation:
- Gather all necessary tools beforehand: This includes a drill, screwdriver, level, measuring tape, pencil, and any additional hardware included with your blinds.
- Double-check your measurements: Accurate measurements are the foundation of a well-fitted blind. Measure twice to ensure precision.
- Don’t skip steps: Each step in the instructions is essential for proper installation. Follow them meticulously, even if you think a step seems trivial.
- Take breaks if needed: Tiredness can lead to mistakes. If you feel overwhelmed, take a breather and return with a fresh perspective.
Conclusion
Avoiding these common blunders and following our expert tips, you can transform your DIY blind installation into a success story.
Remember, precise measurements, proper tools, and a patient approach are key to achieving a flawless finish that complements your home’s décor. If you find yourself needing a helping hand, don’t hesitate to reach out to professionals for a smooth and stress-free experience.